


GCPにGROWIを構築する 02 サーバの設定


Qrunch 2019-02-24 投稿記事
https://crieit.net/posts/GCP-GROWI-01-GCPの続き。
サーバの設定
何はともあれ
sudo apt update
sudo apt upgrade -y
スワップ領域の確保
現状のスワップ領域の確認。
free -m
              total        used        free      shared  buff/cache   available
Mem:            579         180         148           0         250         302
Swap:             0           0           0
スワップ領域の確保をする。
elasticsearchが4Gほど使うとか聞いたことがあるので、多めに。
時間がかかる。
sudo dd if=/dev/zero of=/swapfile bs=1M count=4096
sudo chmod 600 /swapfile
sudo mkswap /swapfile
sudo swapon /swapfile
4GB確保されていることを確認。
free -m
              total        used        free      shared  buff/cache   available
Mem:            579         253          44           0         281         231
Swap:          4095           0        4095
永続化。
sudo sed -i '$ a /swapfile swap swap defaults 0 0' /etc/fstab
Dockerインストール
Dockerインストール。
curl -fsSL https://get.docker.com/ | sh
Docker自動起動設定。
sudo systemctl enable docker
Docker Composeインストール
途中にDocker Composeのバージョンが必要なので、できれば公式サイトを参照。
https://docs.docker.com/compose/install/
コマンドだけメモしておく。
sudo curl -L "https://github.com/docker/compose/releases/download/1.23.2/docker-compose-$(uname -s)-$(uname -m)" -o /usr/local/bin/docker-compose
sudo chmod +x /usr/local/bin/docker-compose
sudo ln -s /usr/local/bin/docker-compose /usr/bin/docker-compose
周辺ツールインストール
入っていなければ。OS選択時にUbuntu Minimalを選択していた場合は必要。
git,neovim(vimでいいやん)
sudo apt install git -y
sudo apt install neovim -y
GROWIダウンロード
git clone https://github.com/weseek/growi-docker-compose.git growi
GROWI設定
cd growi
vim docker-compose.yml
vimでportsを編集。
初期状態だとローカルホストのみになっている。
version: '3'

services:
  app:
    build:
      context: .
      dockerfile: ./Dockerfile
    ports:
      - 3000:3000    # localhost only by default
    links:
      - mongo:mongo
      - elasticsearch:elasticsearch
    depends_on:
      - mongo
      - elasticsearch
    environment:
      - MONGO_URI=mongodb://mongo:27017/growi
      - ELASTICSEARCH_URI=http://elasticsearch:9200/growi
      - PASSWORD_SEED=changeme
      # - FILE_UPLOAD=local     # activate this line if you use local storage of server rather than AWS
      # - MATHJAX=1             # activate this line if you want to use MathJax
      # - PLANTUML_URI=http://  # activate this line and specify if you use your own PlantUML server rather than public plantuml.com
      # - HACKMD_URI=http://    # activate this line and specify HackMD server URI which can be accessed from GROWI client browsers
      # - HACKMD_URI_FOR_SERVER=http://hackmd:3000  # activate this line and specify HackMD server URI which can be accessed from this server container

    command: "dockerize
              -wait tcp://mongo:27017
              -wait tcp://elasticsearch:9200
              -timeout 60s
              npm run server:prod"
    restart: unless-stopped
    volumes:
      - growi_data:/data

  mongo:
    image: mongo:3.4
    restart: unless-stopped
    volumes:
      - mongo_configdb:/data/configdb
      - mongo_db:/data/db

  elasticsearch:
    image: elasticsearch:5.3-alpine
    environment:
      - "ES_JAVA_OPTS=-Xms256m -Xmx256m"  # increase amount if you have enough memory
    command:
      - sh
      - -c
      - "./bin/elasticsearch-plugin list | grep -q analysis-kuromoji || ./bin/elasticsearch-plugin install analysis-kuromoji;
        ./bin/elasticsearch-plugin list | grep -q analysis-icu || ./bin/elasticsearch-plugin install analysis-icu;
        /docker-entrypoint.sh elasticsearch"
    restart: unless-stopped
    volumes:
      - es_data:/usr/share/elasticsearch/data
      - es_plugins:/usr/share/elasticsearch/plugins
      - ./esconfig:/usr/share/elasticsearch/config

volumes:
  growi_data:
  mongo_configdb:
  mongo_db:
  es_data:
  es_plugins:
GROWIインストール起動
初回は必要なプログラムのダウンロード、インストールが行われる。
sudo docker-compose up -d
エラーが起きなければいいね。
状態確認。
sudo docker ps
動作確認
コンソール接続元のブラウザに戻り、「GCPにGROWIを構築する 01」で取得した
外部IPアドレスにポート3000で接続。処理が終わっても実際につながるようになるまで数分かかるので気長に待つ。
例:http://1.2.3.4:3000/
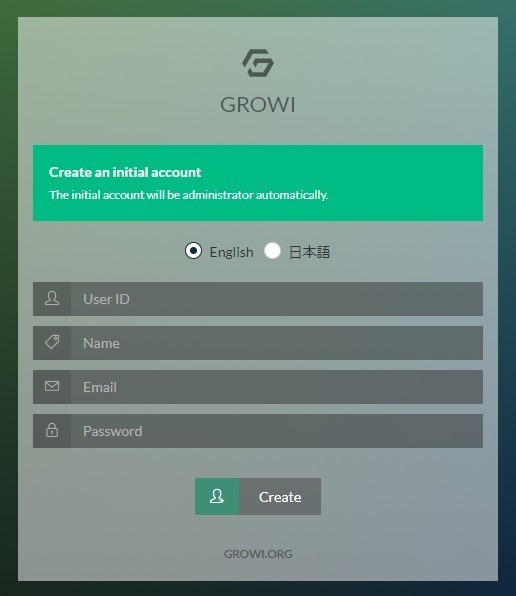
初回ログイン画面が表示されれば成功。お疲れ様!
残作業
- HTTPS対応
- ドメイン持ち込み
参考サイト(Thank you!)
- https://www.karelie.net/free-fast-wordpress-site-kusanagi-docker/
- https://docs.docker.com/compose/install/
- http://exrecord.net/how-to-install-growi-using-docker-compose/
Crieitは誰でも投稿できるサービスです。 是非記事の投稿をお願いします。どんな軽い内容でも投稿できます。
また、「こんな記事が読みたいけど見つからない!」という方は是非記事投稿リクエストボードへ!
こじんまりと作業ログやメモ、進捗を書き残しておきたい方はボード機能をご利用ください。
ボードとは?
コメント